Send A Confirmation Email To Users After They Enter
Learn how to send a confirmation email to users after they enter.
Table of contents
- Default email setup (business plan required)
- Custom email setup (premium plan required)
- Custom logo (premium plan required)
- Custom HTML (enterprise plan required)
- Custom SMTP (enterprise plan required)
- Email send limits by plan
- Example emails
Default email setup
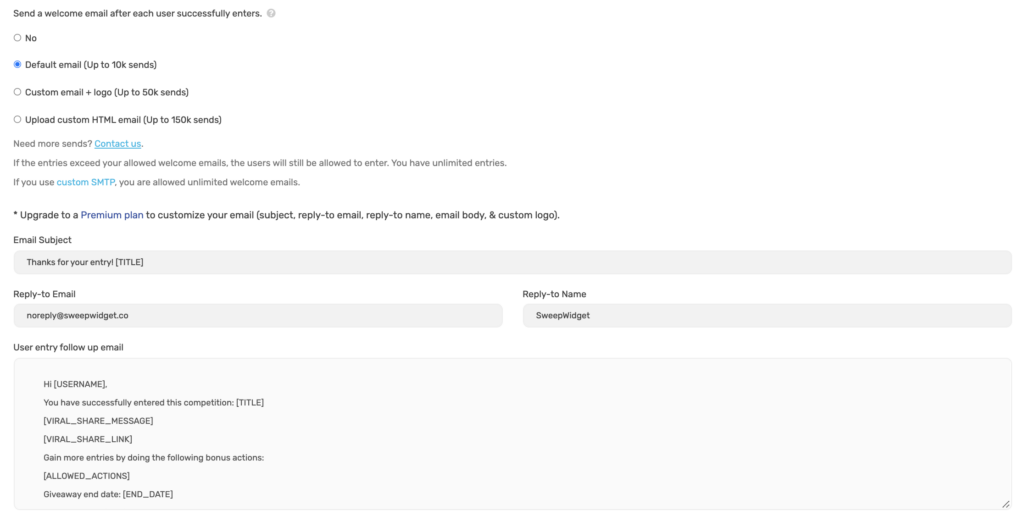
Navigate to the Login Fields tab and find the Send a welcome email after users login section. Then select the Default email option.
With the default email, you can’t edit the email subject or email body. It will send with the default text. The premium plan is required to add custom form fields / logo to the email.

Custom email setup
Select the Custom email option to customize the email subject, body text, and add merge tags.
Available merge tags:
| Merge Tag | Description |
|---|---|
| [USERNAME] | User’s full name |
| [EMAIL] | User’s email address |
| [TITLE] | Giveaway title |
| [BRAND_NAME] | Your brand name |
| [CONTEST_LINK] | Link to the giveaway |
| [START_DATE] | Giveaway start date |
| [END_DATE] | Giveaway end date |
| [VERIFY_EMAIL_CODE] | 4-digit email verification code (if email verification is enabled) |
| [VIRAL_SHARE_MESSAGE] | Viral share prompt text (if viral sharing is enabled) |
| [VIRAL_SHARE_LINK] | User’s unique referral link (if viral sharing is enabled) |
| [ALLOWED_ACTIONS] | List of all entry methods in the giveaway |
Custom logo
You can add your company logo to the email header. The logo will be automatically resized to 200px wide.
Custom HTML
Enterprise plan users can create fully custom HTML emails with complete design control.
Email send limits by plan
| Plan | Email Limit |
|---|---|
| Free | Not available |
| Pro | Not available |
| Business | 5,000 emails |
| Premium | 25,000 emails |
| Enterprise | 100,000 emails |
| Custom SMTP | Unlimited |
Example emails
Here’s an example of what the confirmation email looks like to users.
