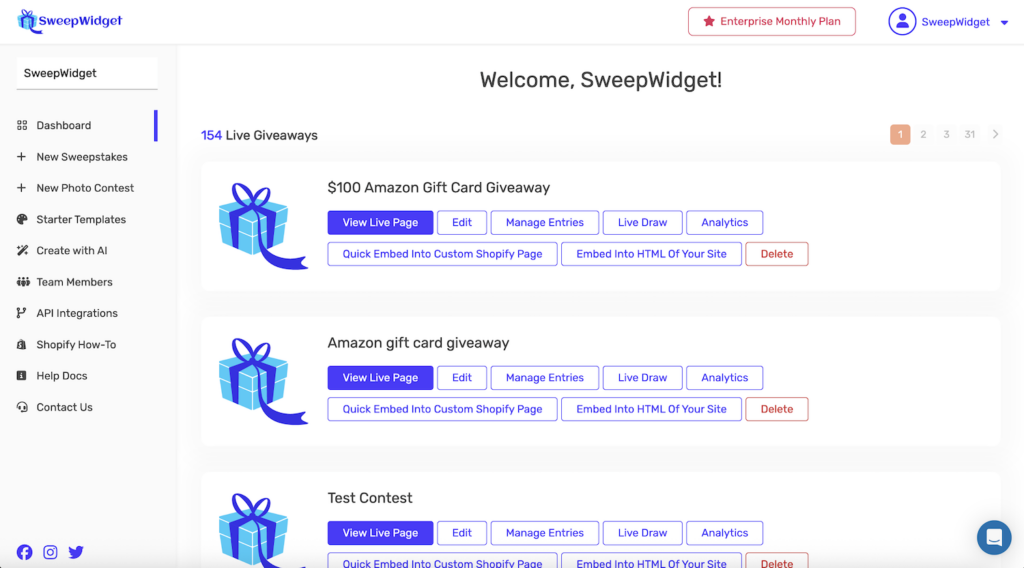
How To Create A Shopify Contest With SweepWidget
This guide shows you how to create a Shopify contest that rewards customers with giveaway entries for making purchases in your store. With SweepWidget’s Shopify integration, you can automatically track purchases and award entries – no manual verification required.
Download the SweepWidget app from the Shopify App Store to get started.
What You Can Do With Shopify + SweepWidget
- Reward purchases with entries – Customers earn giveaway entries for every dollar spent
- Auto-verified tracking – Purchases are tracked automatically via the Shopify API
- Select specific products – Choose which products count toward entries or track all products
- Quick-embed pages – Create giveaway pages directly in your Shopify store with one click
- Retroactive entries – Past purchases made while the giveaway is live are automatically credited
Step 1: Install the SweepWidget App
- Go to the Shopify App Store
- Search for “SweepWidget” and click Install
- Authorize the app to connect to your Shopify store
- Once installed, open SweepWidget from your Shopify admin center
Step 2: Create a New Giveaway
From your SweepWidget dashboard, click + New Sweepstakes or + Create New Giveaway to start building your contest.
Step 3: Add the Purchase Entry Method
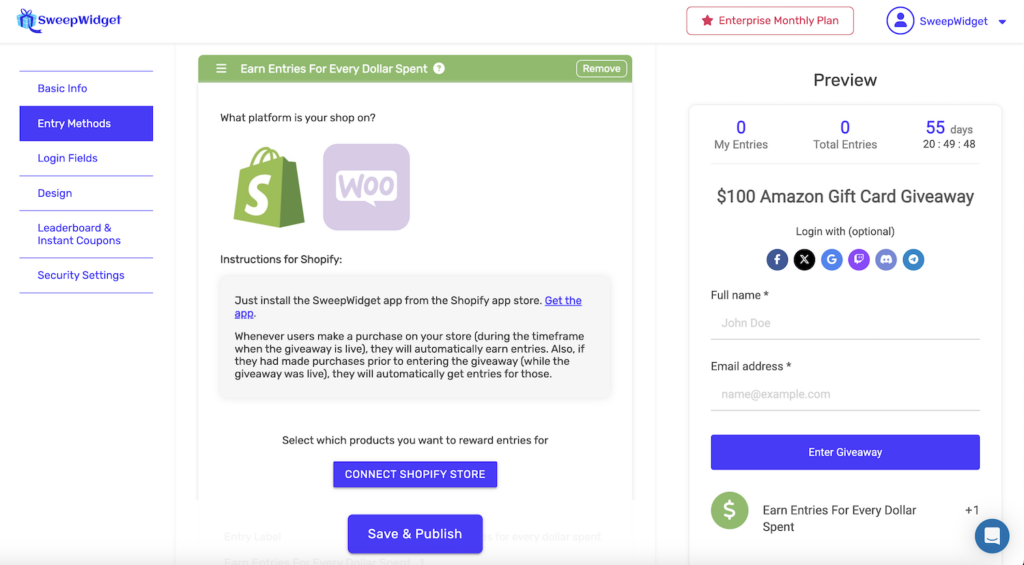
In the giveaway builder, go to the Entry Methods tab and click + Add Entry Method.
- Click the Purchase Products button (green with $ icon)
- Select “Earn Entries For Every $1 Spent”
- You’ll see three platform options:

Platform Options
| Platform | Verification | Description |
|---|---|---|
| Shopify | Auto-Verified | Purchases tracked automatically via Shopify API |
| WooCommerce | Auto-Verified | Purchases tracked automatically via WooCommerce API |
| Other | Manual | For other e-commerce platforms (requires manual verification) |
Purchase Tracking Limits by Plan
| Plan | Orders Tracked |
|---|---|
| Pro | 100 orders |
| Business | 1,000 orders |
| Premium | 5,000 orders |
| Enterprise | Unlimited orders |
Step 4: Connect Your Shopify Store
- Select Shopify as your platform
- Click the CONNECT SHOPIFY STORE button
- If you installed via the Shopify App Store, your store will connect automatically
How it works:
- Purchases are tracked in real-time (updated every 60 minutes) using the Shopify API
- Users only receive entries after successfully completing a purchase
- If users made purchases prior to entering the giveaway (while it was live), they automatically get entries for those purchases too
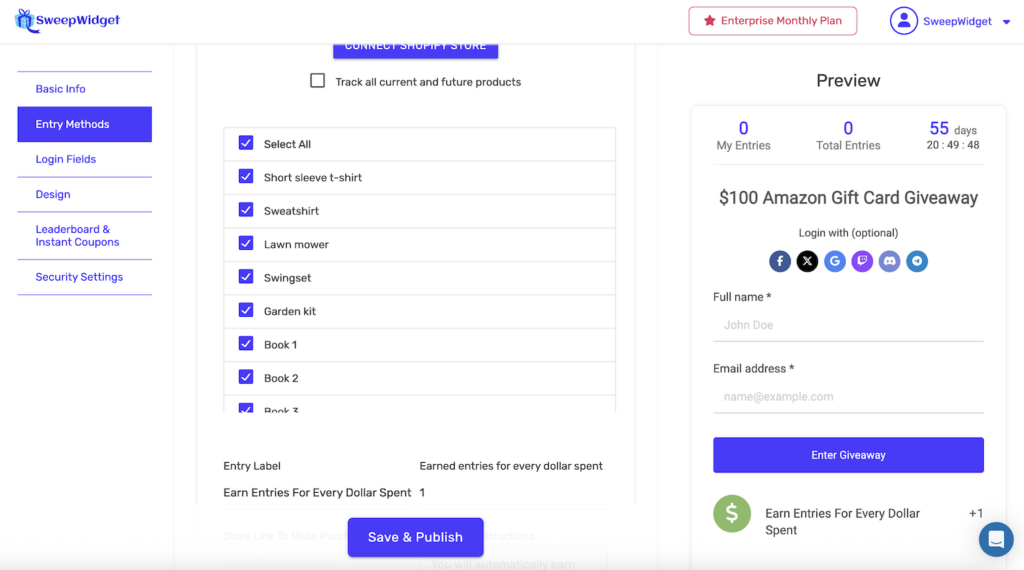
Step 5: Select Which Products to Track
After connecting your store, choose which products should count toward giveaway entries:
- Track all current and future products – Check this box to include every product in your store
- Select specific products – Manually choose which products qualify for entries
Step 6: Configure Entry Settings
Customize how the purchase entry method works:
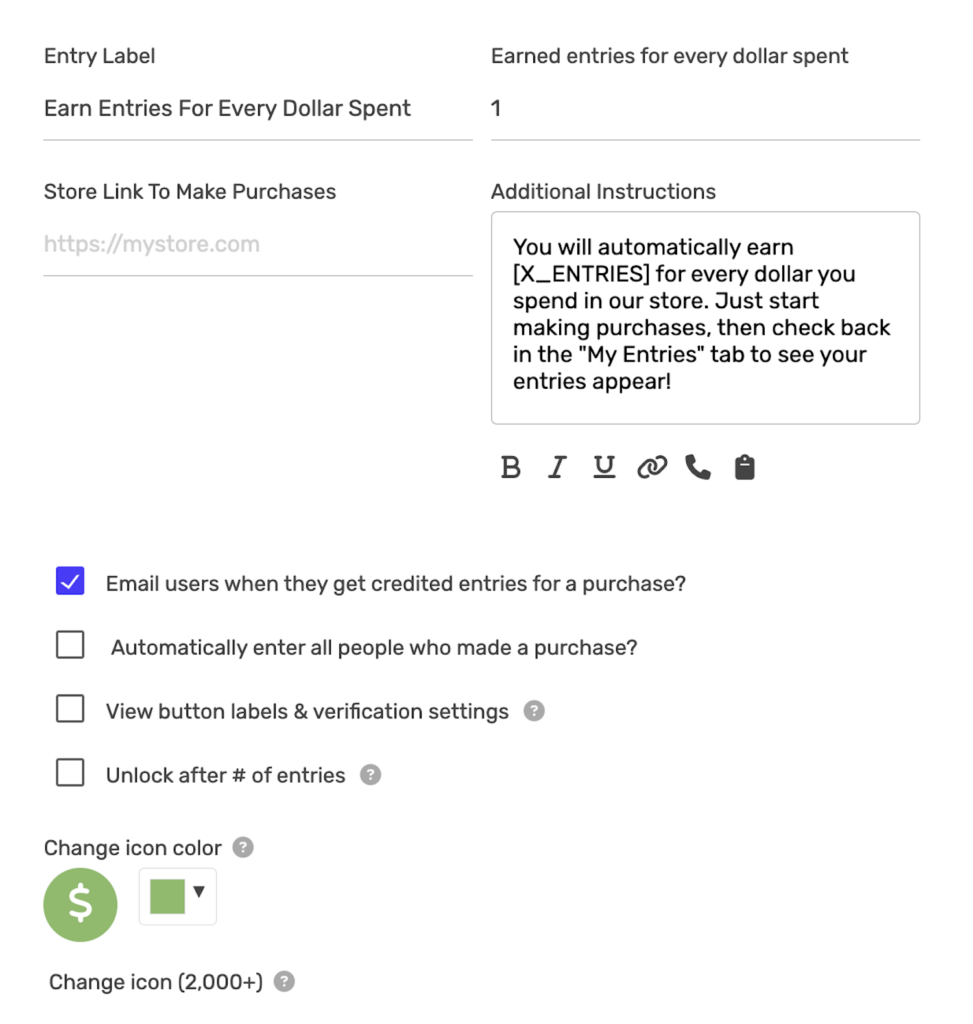
Entry Label
The text displayed on the entry method button. Default is “Earn Entries For Every Dollar Spent”.
Earned Entries for Every Dollar Spent
Set how many entries customers earn per dollar. For example, setting this to “1” means a $50 purchase earns 50 entries.
Store Link To Make Purchases
Enter your store URL (e.g., https://mystore.com). This creates a button in the widget that directs users to your store.
Additional Instructions
Custom text shown when users expand the entry method. You can use the [X_ENTRIES] merge tag to dynamically show the number of entries earned.
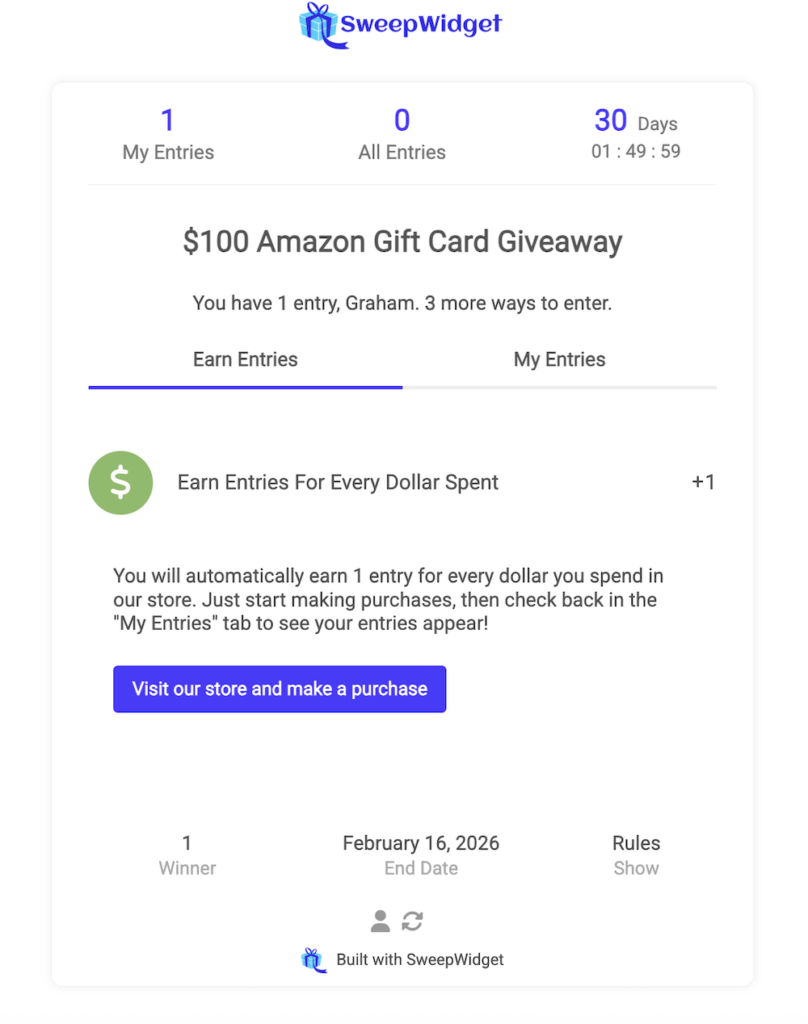
Example: “You will automatically earn [X_ENTRIES] for every dollar you spend in our store. Just start making purchases, then check back in the ‘My Entries’ tab to see your entries appear!”
Additional Options
- Email users when they get credited entries for a purchase – Send automatic notifications when purchase entries are awarded
- Automatically enter all people who made a purchase – Auto-enroll purchasers even if they haven’t visited the giveaway widget
- View button labels & verification settings – Customize button text and verification options
- Unlock after # of entries – Require users to earn a certain number of entries before this method becomes available
- Change icon color – Customize the entry method icon color to match your branding
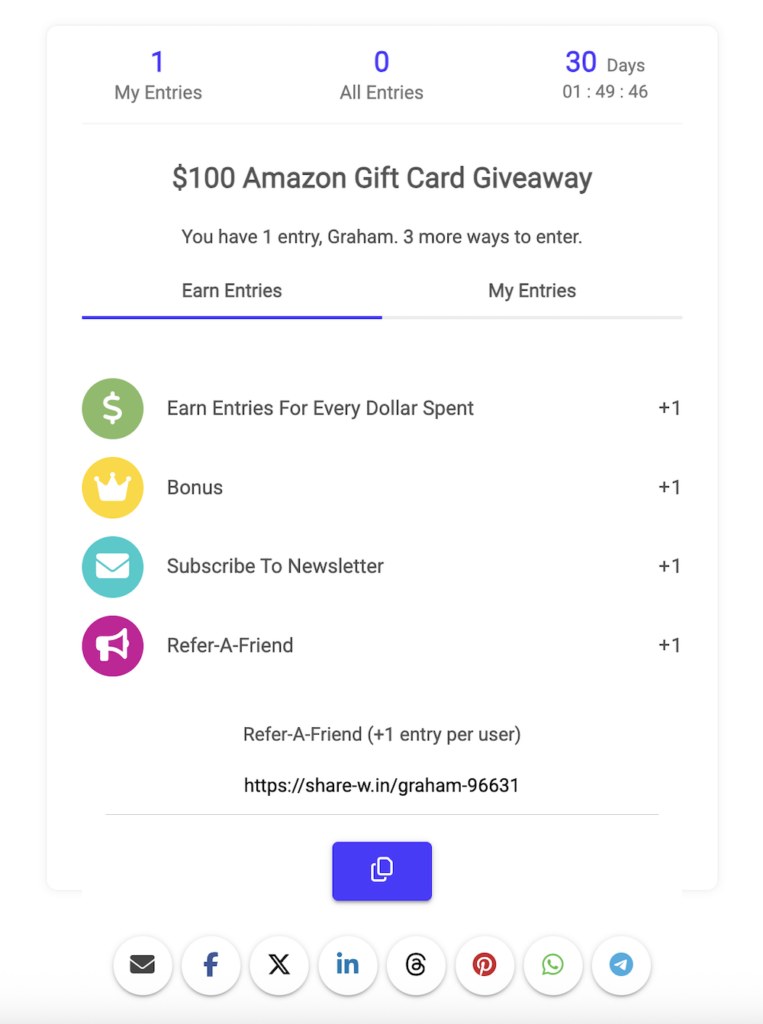
Step 7: AMOE (Alternative Method of Entry)
When you add a purchase-based entry method, SweepWidget automatically adds a Refer-A-Friend entry method as an AMOE (Alternative Method of Entry).
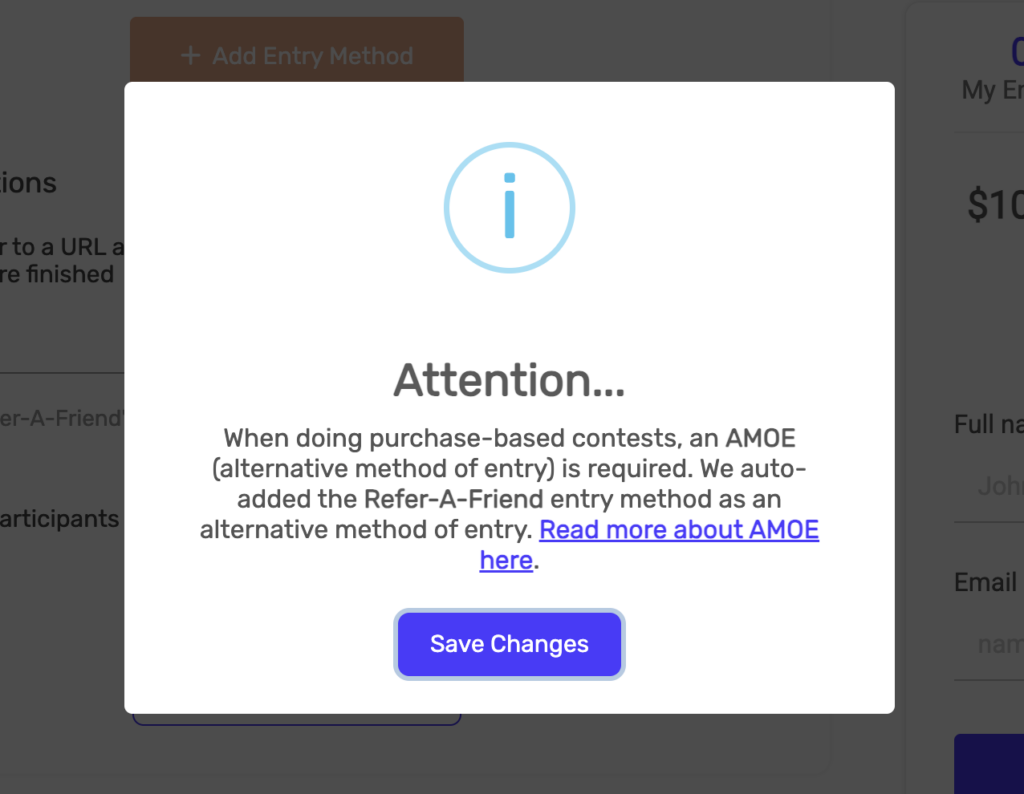
Why is this required?
In many jurisdictions, sweepstakes laws require that participants have a free way to enter (no purchase necessary). The Refer-A-Friend entry method satisfies this requirement by allowing users to earn entries by sharing your giveaway – no purchase required.
Learn more about AMOE and legal compliance
Step 8: Publish Your Giveaway
Once you’ve configured your entry methods and other giveaway settings:
- Review all tabs (Basic Info, Entry Methods, Login Fields, Design, etc.)
- Click Save & Publish at the bottom of the page
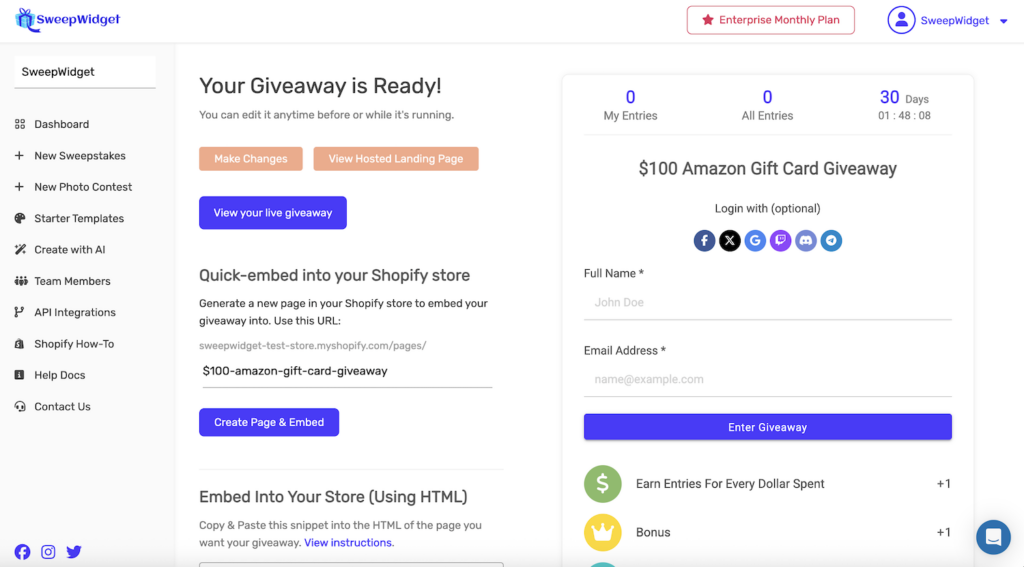
- You’ll be taken to the “Your Giveaway is Ready!” page
Step 9: Embed in Your Shopify Store
After publishing, you have two embedding options:
Option A: Quick-Embed (Recommended)
The fastest way to add your giveaway to your Shopify store:
- In the Quick-embed into your Shopify store section, enter a page URL slug
- Example:
your-store.myshopify.com/pages/100-amazon-gift-card-giveaway - Click Create Page & Embed
- SweepWidget automatically creates a new page in your Shopify store with the giveaway embedded
After successful embedding, you’ll see a confirmation message:
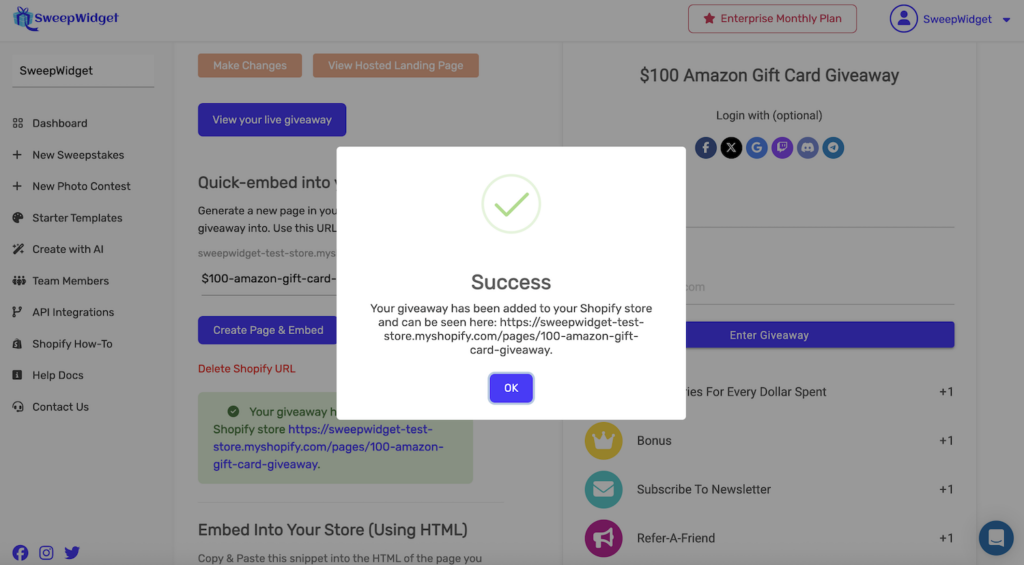
You can also Delete Shopify URL if you need to remove the page from your store.
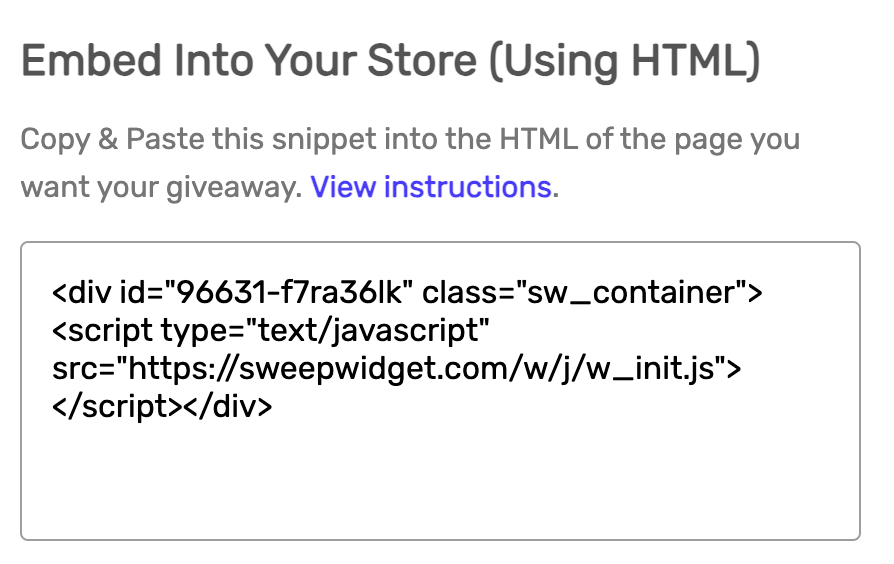
Option B: Manual HTML Embed
If you want more control over placement:
- Copy the embed code from the Embed Into Your Store (Using HTML) section
- In your Shopify admin, go to Online Store > Pages
- Create a new page or edit an existing one
- Click the </> button to switch to HTML mode
- Paste the SweepWidget embed code
- Save the page
Option C: Use the Hosted Landing Page
If you don’t want to embed in your Shopify store, use the free SweepWidget hosted landing page. Simply share the provided URL (e.g., sweepwidget.com/c/96631-f7ra36lk) on social media, email, or anywhere else.
How the Widget Looks to Participants
Here’s what participants see when they enter your giveaway:

When they click the purchase entry method, they see instructions and a button to visit your store:
The Refer-A-Friend entry method gives participants a unique sharing link:
Important Notes
- Same email required: For purchases to be tracked, customers must use the same email address for both the giveaway entry AND their Shopify purchase
- Processing time: Purchase entries are updated approximately every 60 minutes
- Retroactive credit: If a customer makes a purchase before entering the giveaway (but while it’s running), they’ll automatically receive entries when they do enter
- AMOE compliance: Always include a free entry method (Refer-A-Friend is added automatically) to comply with sweepstakes laws
Troubleshooting
Purchases aren’t being tracked
- Verify the customer used the same email for the giveaway and Shopify order
- Wait up to 60 minutes for entries to sync
- Check that the SweepWidget app is still connected in your Shopify admin
- Ensure the purchased product is selected in your entry method settings
Can’t connect Shopify store
- Make sure you installed SweepWidget from the Shopify App Store (not just signed up on sweepwidget.com)
- Try reinstalling the app from the Shopify App Store
- Contact support if connection issues persist