How to Make a SweepWidget Photo Voting Contest
In this article, we will show you how to make a stunning photo contest with SweepWidget! You will learn how to let photographers upload a photo or video. Then, you’ll see how your audience can view, sort, and vote on their favorites. Once the contest concludes, you can either have the person with the most votes be considered the winner. Or, you can have it so you randomly or manually selected the winner. Let’s start!
View a live example photo voting contest
Create the photo contest
First, you’ll need to click on the New Photo Contest link in the left nav bar of your SweepWidget account.
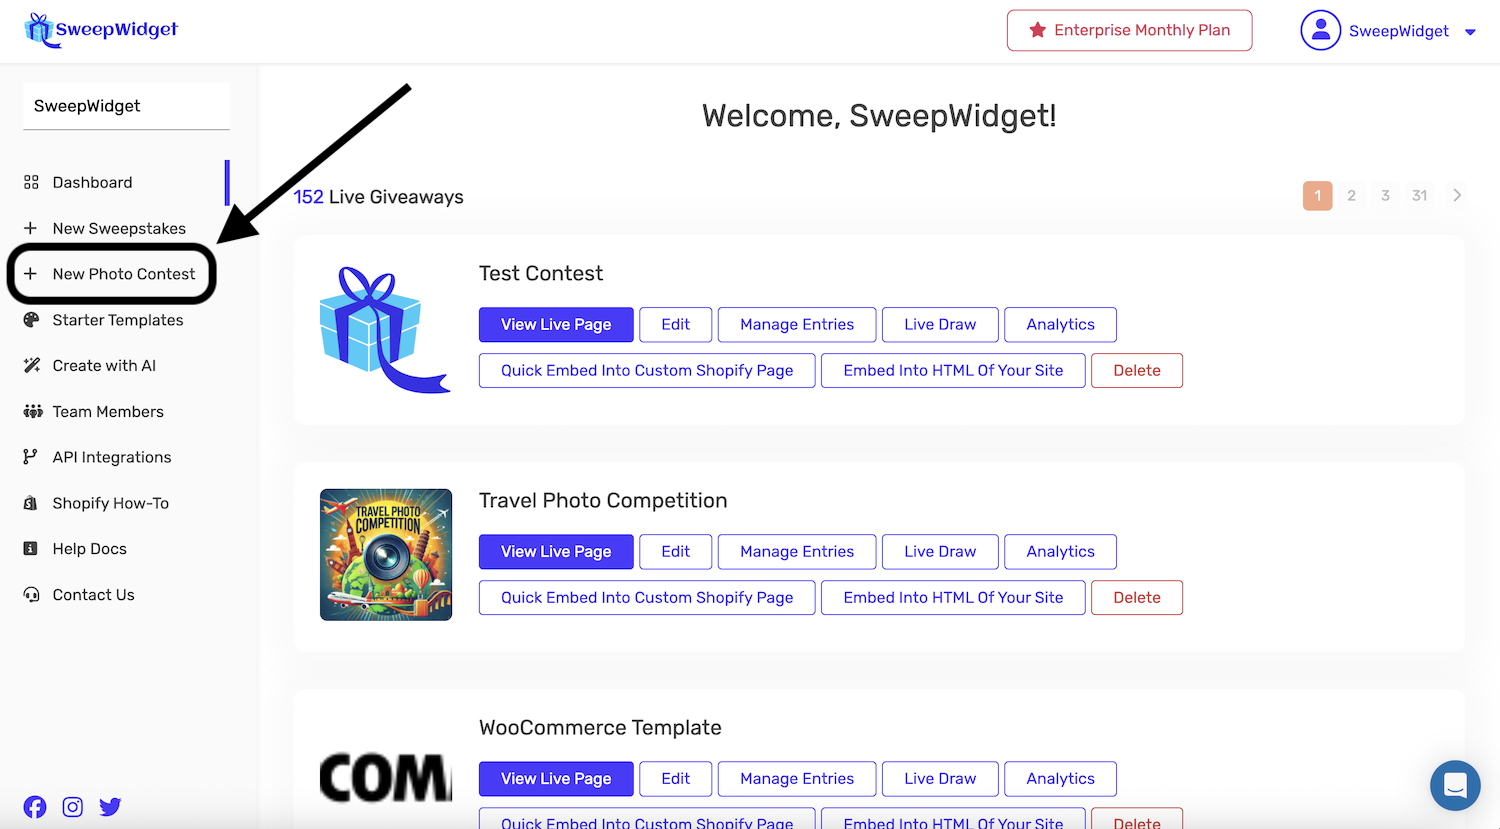
Photo contests have a different tab structure than regular giveaways. Here are the tabs you’ll work with:
- Entry Form Info – Basic contest details (title, description, dates, rules, prizes)
- Photo/Video Upload Options – Configure what participants can upload
- Login Fields – Custom form fields for photographers (address, age, etc.)
- Design – Customize colors, fonts, and layout
- Voting Settings – Gallery display and voting configuration
- Security Settings – Anti-spam, geo-restrictions, and verification options
- Post-Entry – Thank you message and redirect settings
Step 1: Entry Form Info
Start with the Entry Form Info tab and fill out the basic details for your contest: title, description, start/end date, rules, prizes, and language.
Step 2: Photo/Video Upload Options
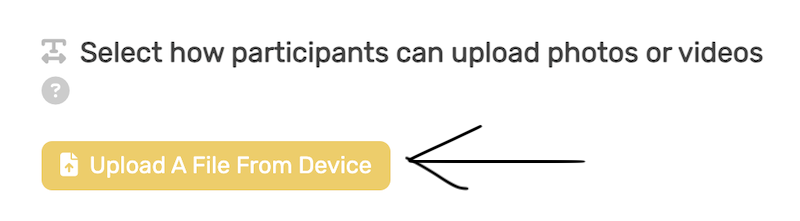
Click on the Photo/Video Upload Options tab. From here, you’ll select the Upload a File From Device button.
Next, describe what the photographer must upload – a picture of a mountain, a photo from an event, a picture of their cat, etc.
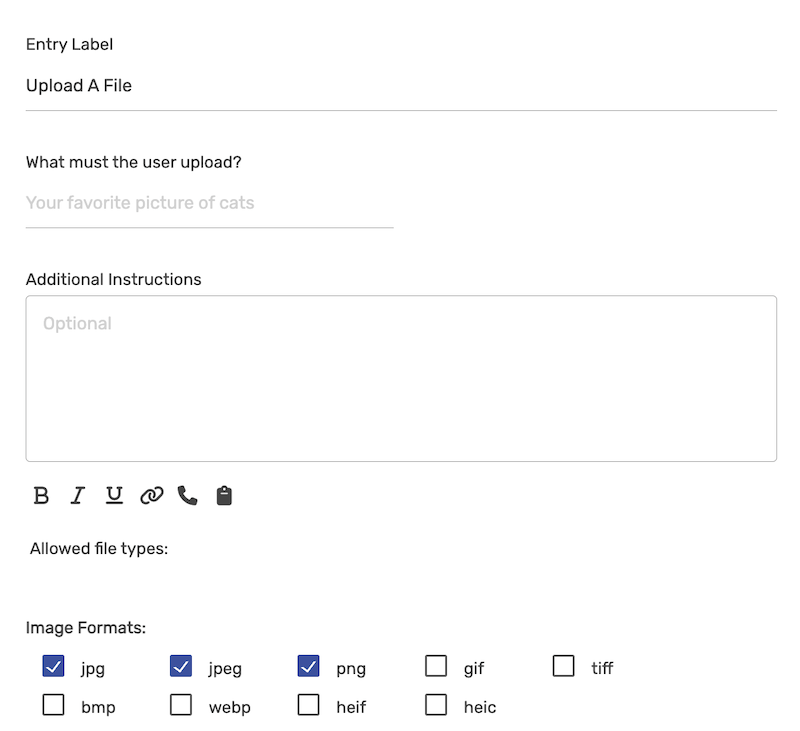
Supported file types and limits: You can accept photos (JPG, PNG, GIF) and videos (MP4, MOV, AVI) up to 100MB in size. This ensures high-quality submissions while maintaining fast loading times for your gallery.
Captions: Each entry can include its own caption when it is added. The caption appears with the entry in the gallery, including in the pop-up when someone opens it – handy for naming or describing each photo or video.
Video previews: Video entries automatically show a still frame from the video as their thumbnail in the gallery, so every entry is easy to tell apart at a glance.
Step 3: Login Fields (Optional)
In the Login Fields tab, you can set custom form fields for photographers to fill out, such as address, age, phone number, or any other information you need to collect.
Step 4: Design
In the Design tab, customize the style of your contest widget. Match your brand colors, fonts, and layout to create a seamless experience for your participants.
Voting Settings
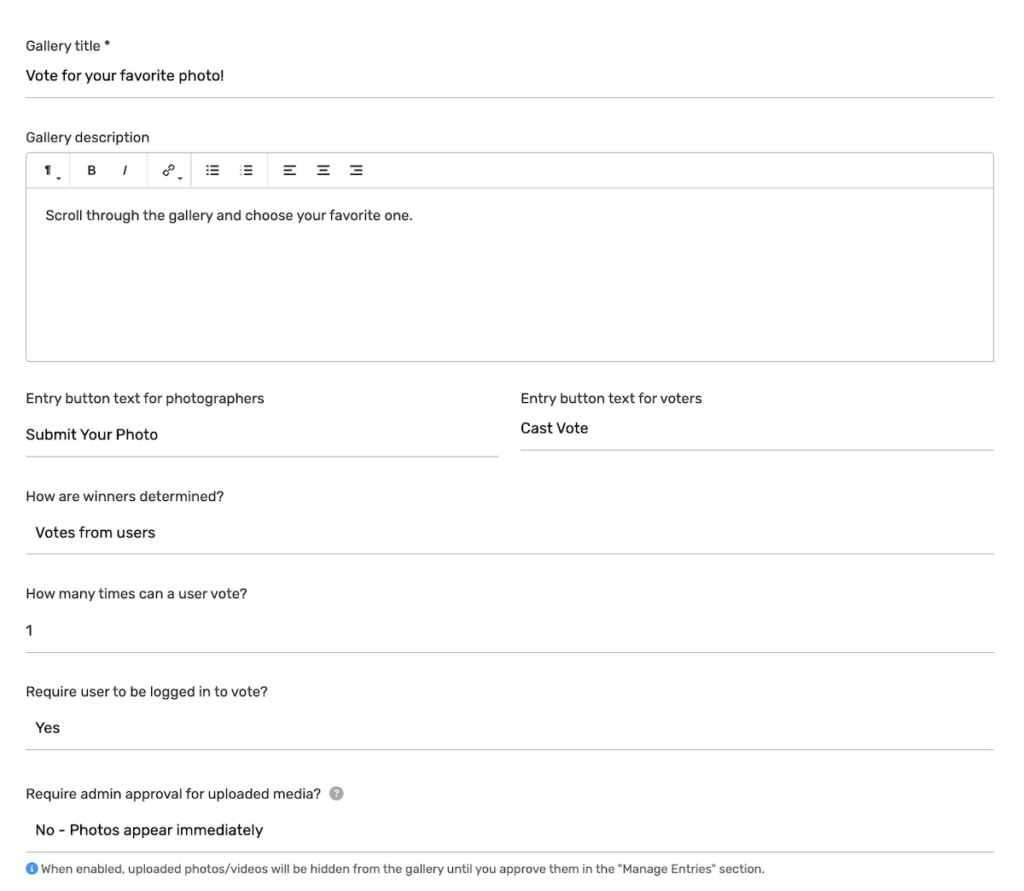
Click on the Voting Settings tab. This is where you configure how your photo gallery displays and set up the voting experience.
Gallery display options:
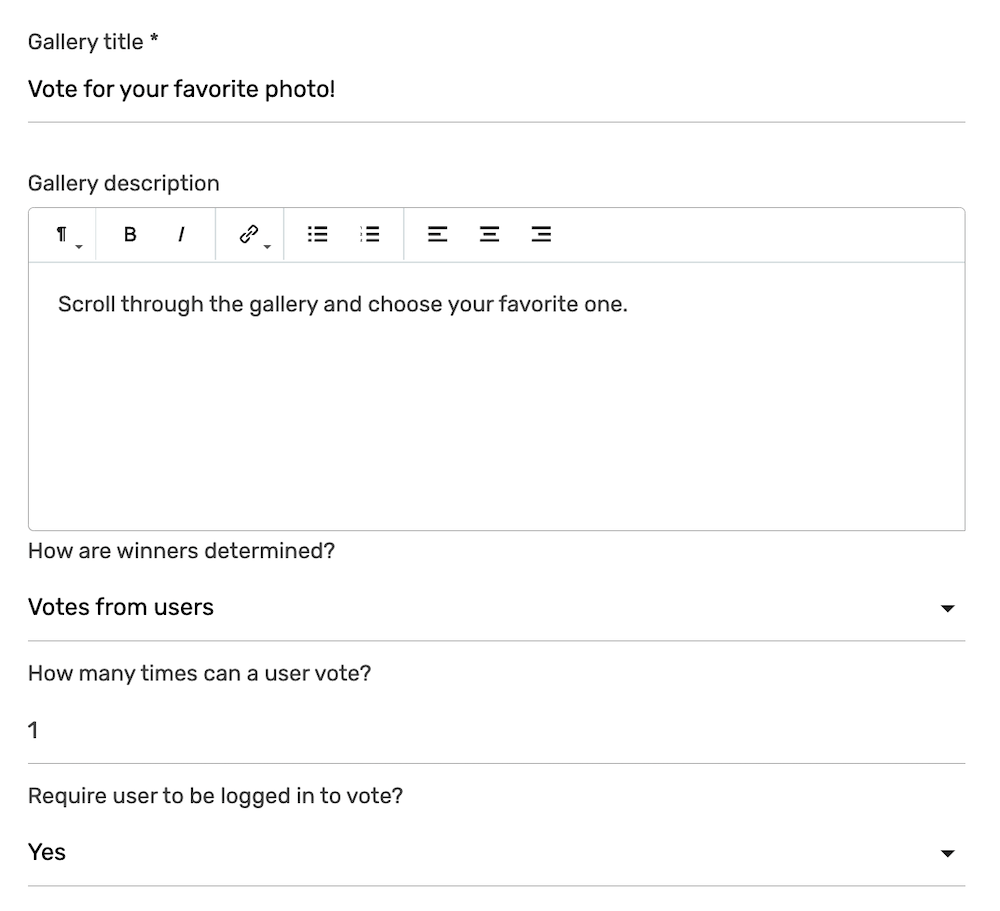
- Gallery title – The heading displayed above your photo gallery (e.g., “Vote for your favorite photo!”)
- Gallery description – Instructions for voters (e.g., “Scroll through the gallery and choose your favorite one.”)
- Entry button text for photographers – The button photographers click to submit (default: “Submit Your Photo”)
- Entry button text for voters – The button voters click to cast their vote (default: “Cast Vote”)
Submissions:
- Allow participants to submit their own entries? – Choose “Yes” so visitors can upload their own photos/videos, or “No” for a curated, voting-only contest where you add every entry yourself and visitors can only vote. When set to “No,” the submit button is hidden on the gallery and uploads are blocked, leaving just the voting buttons.
Winner determination:
- How are winners determined? – Choose between “Votes from users” (highest votes wins) or admin selection
Voting controls:
- How many times can a user vote? – Set the number of votes per person (1, unlimited, etc.)
- How often does that limit apply? – Choose In total (a lifetime cap), Per hour, or Per day. For example, set the vote count to 1 and the period to Per hour to let each person vote once every hour.
- Require user to be logged in to vote? – When set to “Yes,” voters must authenticate via social login (Google, Facebook, X, etc.) to prevent duplicate votes
Media approval workflow:
- Require admin approval for uploaded media? – Choose “Yes” to review submissions before they appear in the gallery, or “No – Photos appear immediately” to let uploads display right away
When media approval is enabled, uploaded photos/videos will be hidden from the gallery until you approve them in the Manage Entries section. This is essential for maintaining quality control and ensuring only appropriate content appears in your contest.
Security Settings
Click on the Security Settings tab to configure anti-fraud measures and entry restrictions.
Anti-spam settings:
Choose your spam protection level:
- Weak – Minimal protection, best for trusted audiences
- Standard – Balanced protection (recommended for most contests)
- Strong – Enhanced protection against bots and fake entries
- Strict – Maximum protection, may require additional verification
Geographic and IP restrictions:
- Geo-location: only allow entries from specific countries – Restrict entries to certain countries
- Block duplicate IP addresses – Prevent multiple entries from the same IP
- How many emails can the same person enter with? – Limit entries per email address
- Only allow specific IP Addresses to enter – Great for live events where you want only attendees to participate
Entry limits:
- Set maximum number of people who can enter – Cap total participants
- Set maximum number of allowed entries – Cap total entries across all participants
Fraud prevention:
- Block VPN’s – Strongly recommended to prevent users from circumventing IP restrictions
- Block high risk email providers – Block disposable/temporary email addresses
- Only allow specific emails to enter – Create an email whitelist for exclusive contests
Privacy and compliance:
- Show cookies consent form to participants – Display a GDPR-compliant consent form
- Remove SweepWidget Google Analytics tracking – Disable analytics tracking if needed
Email/Text verification:
- No – No additional verification required
- Require email verification code – Send a verification code to the participant’s email
- Require text verification code – Send an SMS verification code (requires Twilio.com account integration)

Embed Your Photo Contest
Once your contest is created, you have multiple options to share it:
- Hosted Landing Page: SweepWidget provides a free hosted landing page at a unique URL
- Embed on Your Website: Copy the embed code and paste it into any page on your website
- WordPress Plugin: Use our WordPress plugin for easy integration
- Shopify App: Install our Shopify app to embed contests in your store
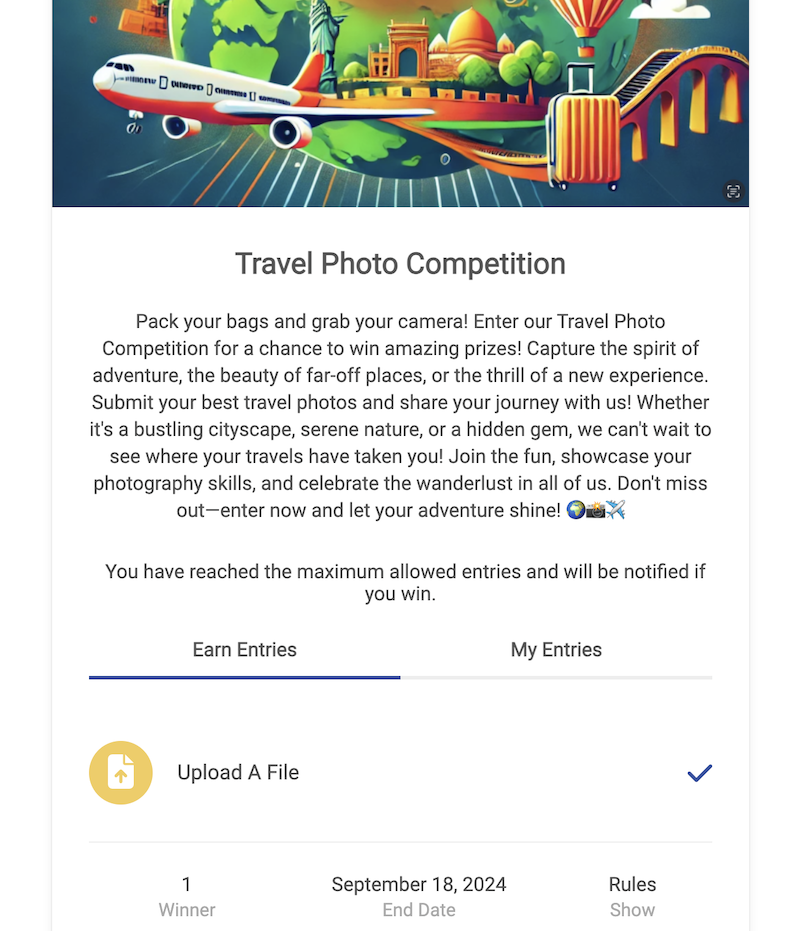
Enter the live photo contest
Now that the contest is live, you can view it! Here’s an example of how the landing page might look.

You’ll notice an Upload a Photo button in the top right. This is for photographers to click on so they can upload their photo or video.
From here, they can enter their name/email and upload their photo or video.
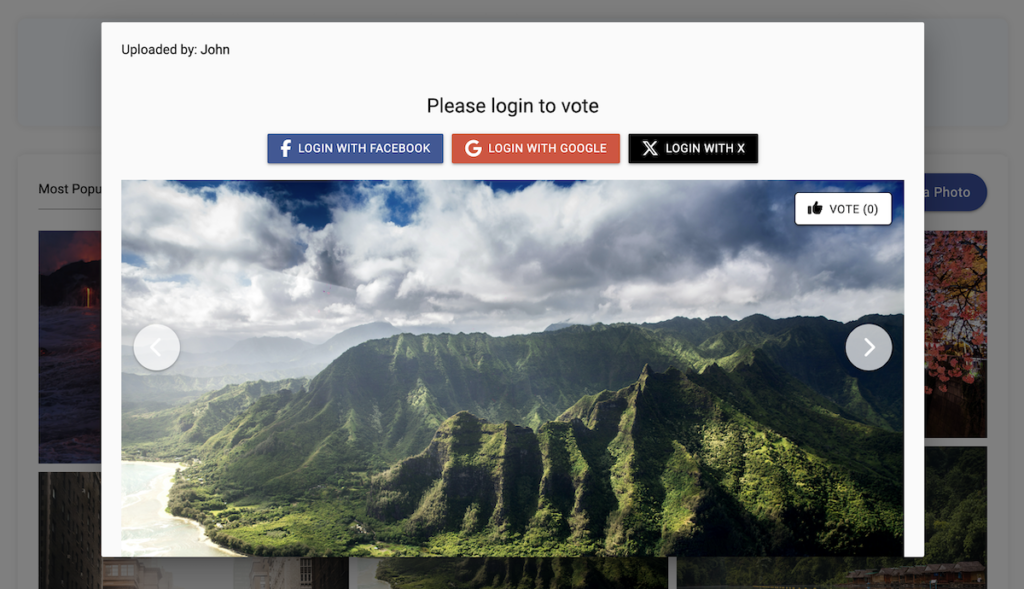
How do people vote?
For people who want to vote, they can simply click on any image in the gallery and vote! If you enabled “Require user to be logged in to vote,” they’ll need to authenticate via Google, Facebook, or X first. This is recommended to prevent cheating and duplicate votes from the same people.
Voters can also sort and filter the gallery by:
- Top Voted: See the entries with the most votes
- Most Recent: View the newest submissions first
- Random: Browse entries in random order
Managing Submissions
Go to Manage Entries to view all photo/video submissions. From here you can:
- View submission details and vote counts
- Approve or reject pending submissions (if media approval is enabled)
- Delete inappropriate entries
- Export all data to CSV
- Contact submitters directly
Winner Selection
When your contest ends, you have several options for selecting winners:
1. Based on Votes
If you set “How are winners determined?” to “Votes from users,” the entry with the most votes wins. You can choose top 1, 3, 5, or any number of winners.
2. Random Selection
Use the Randomly Pick Winners button in Manage Entries to randomly select winners from all approved entries. This is fair when you want to give everyone an equal chance regardless of votes.
3. Manual Selection
You can also manually mark specific entries as winners from the Manage Entries dashboard.
Best Practices for Photo Contests
- Enable media approval to ensure quality and appropriate content
- Require social login for voting to prevent fraud and duplicate votes
- Block VPNs to prevent users from circumventing restrictions
- Set clear submission guidelines in your contest description
- Promote across multiple channels – social media, email, website
- Engage with participants by commenting on submissions and sharing top entries
- Offer attractive prizes to encourage high-quality submissions
- Run for 2-4 weeks to give people time to submit and vote
That’s the complete guide! We hope you enjoy the SweepWidget photo contest tool and run successful campaigns for your brand, organization, or community!
FAQ:
For the photo contest, how many people can vote per contest?
You can have unlimited votes per contest! You also have the option to limit how many teams each user can vote.
Is there a limit how many people can submit photos on each contest?
You’re allowed unlimited photo submissions in your contests.